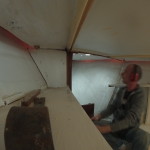
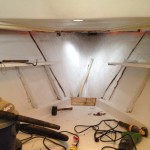
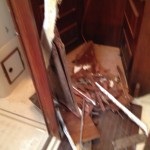
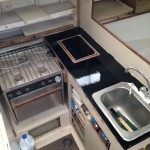
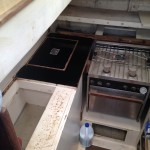
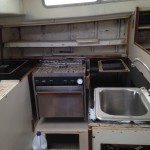
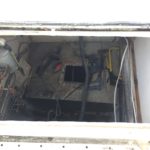
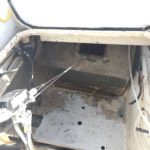
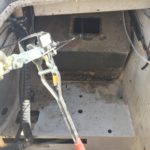
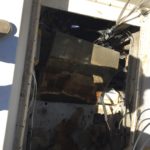
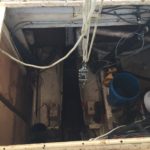
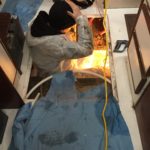
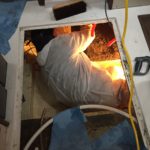
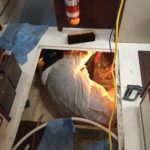
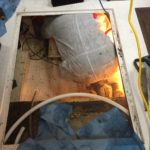
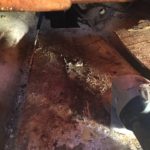
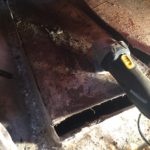
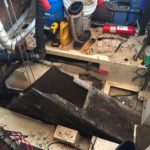
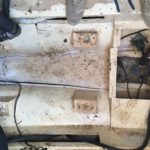
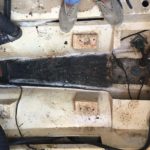
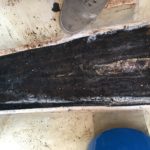
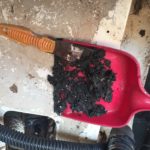
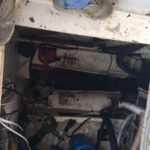
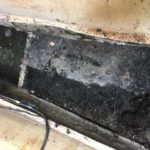
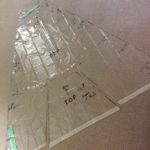
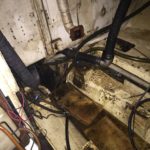
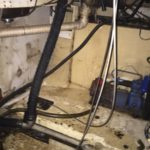
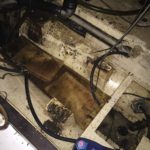
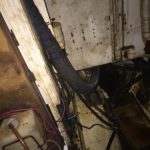
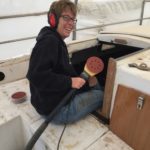
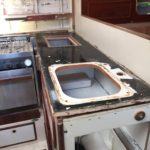
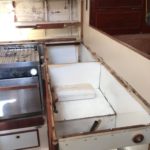
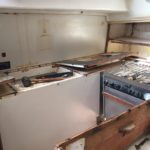
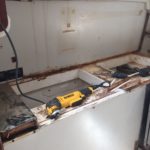
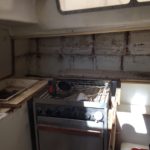
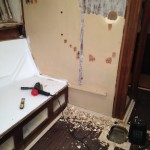
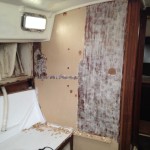
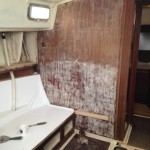
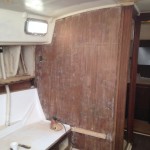
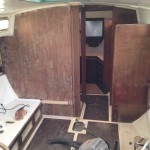
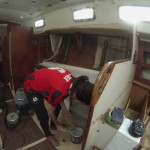
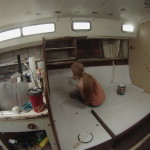
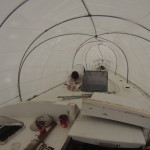
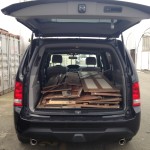
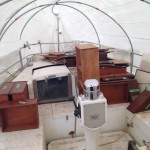
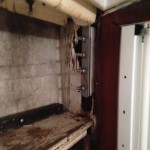
Out of darkness and into the light!

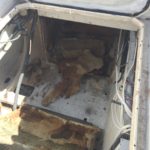
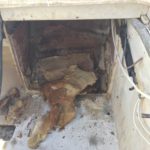
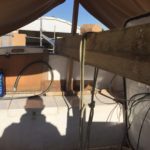
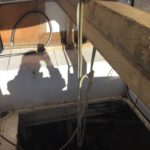
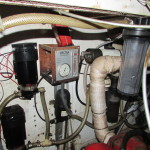
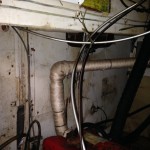
We have officially moved from demolition to renovation in the engine room! There is a lot of cleanup left, still need to remove a few old fuel lines, some sanding, some painting, install some insulation, have the new tanks made, install them, and then Prodigy Marine will do the new engine install, but we have officially moved out of the darkness and into the light.
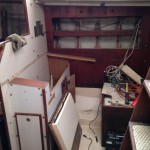
Akupara looks like a bomb went off inside of her with fiberglass dust everywhere and panels from around the tanks and all kinds of stuff, but is it ever nice to be done this job! I don’t mind the new work, it is much easier of course!

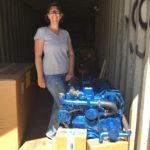
And the Admiral got to see the new engine yesterday! She said it sparkles! I guess that means it’s ok! 🙂

Keel Tank Removal -Part 3

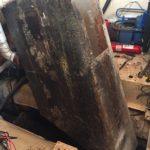
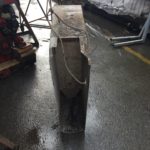
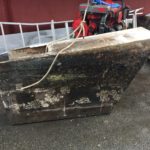
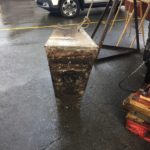
It’s out. Finally!

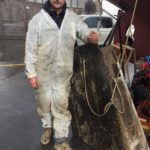
I have to say that was one of the worst jobs I have ever had to complete on a boat. I have never been so dirty, smelly or sore in all my boat renovation projects.

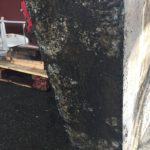
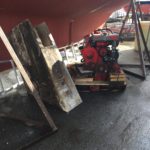
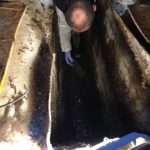
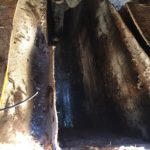
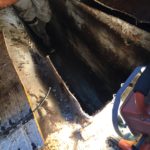
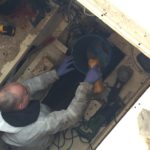
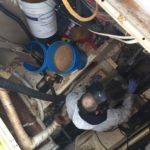
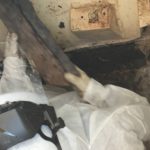
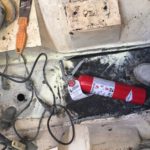
I am going to let the pictures tell the story and will keep my comments short.

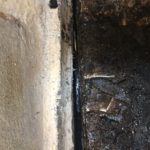
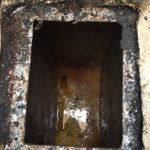
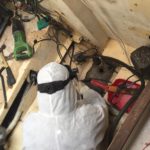
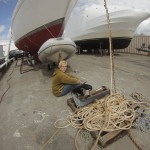
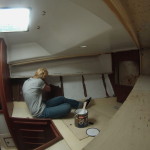
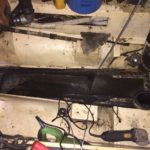
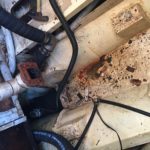
Here I have managed to cut the rest of the glass flange that is holding the tank in place and I was able to move it a couple o finches without any issue so thankfully I knew it was free.This is not as quick and painless as it looks, getting to this part from initially freeing the tank was about an hour.Something strange with that light, seems to add a shiny spot on the top of my head…Post tank removal. Now there was about 4 inches of shit to clean out. I assume it was what was left of the foam but of course it was drenched in black crap. So what did I learn from this project?

On our last boat we had a strange smell that only surfaced when we were under way. We had cleaned every square centimetre of the bilge multiple times and when at anchor or moored, the bilge smelt like flowers. Get the boat moving and it was disgusting. I have a solid belief that I know what the cause was now. There was no keel tank, however I think the encapsulated ballast had seawater fermenting around it, it is the only thing I can think of.

The keel tank is absolutely MASSIVE in size. I will be putting another tank down there, but it will not be aluminum or stainless, it will be plastic so nobody (me when I am 90) ever has to deal with a rotted out tank down in the bilge.

In hindsight we probably should have done this job right in the beginning when I was 3 years younger.

Nothing in boat repair is impossible for the do it yourselfer. We could have paid to have this done, but where is the fun in that?

Another Whitby owner who did this job commented that if he had to do it again, he could probably do it in about 3 1/2 hours. Well, I am sure I could make the same claim, or close to it now, but as is common with everything, take your initial estimate and multiply it. In this case, basically 3.5 hours meant 3.5 days for us.

I also learnt that I am getting tired of rebuilding boats.

At some point, I will put all of this together into a handy guide for any other Whitby 42 owner, in the meantime, if you have questions, please send them my way, and I will be glad to do everything in my power to talk you into paying someone else to do the job! And no I am not doing it 🙂

Keel Tank Removal-Part 2

Okay so the tank won on the 2nd day as well. All in all I spent 7 hours working on this project today. Why so long? Let me explain.

In order to cut the tank in half so that it can be removed I needed to get rid of the last of the sludge in the bottom of the tank. This process involved standing inside the tank and using a scoop to fill 5 gallon buckets. But before that I am missing the part about cutting the top off.

Cutting the top of the tank off, well at least the portion from the old inspection plate to the back was very simple and went really quick. Sawzall and good quality Dewalt metal cutting blades did the trick in minutes. Unfortunately there is not enough room between the tank and the keel to be able to cut it in half with the sawzall. That would have made things a lot easier. once the top was off, I could get down inside and clean it out a lot better.


Unfortunately, as I mentioned yesterday, the entire tank is sitting in a puddle of water/diesel/grease and god only knows what else. The inside of the tank had a water mixture with what looks like beer fermentation foam on it. All of this had to be scooped out into 5 gallon pails, carried up on deck, down the ladder and dumped into a 40 gallon drum. And this process had to be repeated as I cut down the sides of the tank and all of the other goop poured in.

In order to cut the tank in two, I had to stand inside of it and cut it with the grinder and a good cutting blade. This process in itself isn’t really all that time consuming with the exception of all the liquid on the outside of the tank. Every time I cut the side down an inch, I had to wait until the liquid drained down to that level. This is what took so bloody long. I could not simply cut it in two as I was standing in the liquid using power tools. Not my idea of a fun day to electrocute myself removing a keel tank.


I am not sure how anyone can possibly do this job without standing inside the tank. It is a long way down to the bottom and would be impossible to cut the very bottom without standing inside, bent over and doing it with a grinder. To speed it up a little bit, I drilled a series of holes in a straight line across the bottom and finished it with the angle grinder. Of course, the grinder only fits so well into corners so I had to do a fair bit of screwing around right at the bottom.

I am not sure of the exact depth yet, but there is a fair amount of space underneath the tank itself. I thought I might be drilling into the keel, but nope.

For anyone who reads this blog and is contemplating the same job here in a nutshell are things I learned today. Bending over cutting an aluminum tank while standing in it sounds like a lot of fun I know, but it is cramped, which means you are cramped, which means you are bent over for hours trying to do this. Also, make sure the angle of your cut is in the correct direction. Mine ended up being in the wrong direction needed to remove the back half of the tank first, which meant I had to go back in and cut v notches into the tank wall.

Buy good quality blades, Dewalt worked great for me.

Whatever this mess of liquid is stinks up to high hell and even after a 30 minute super hot shower with lots of soap, you can still smell it on yourself.

The success for the day is that the tank is officially in 2 pieces now and the back chunk should come out now.

This is definitely one of those jobs that make you ask yourself why. Why rebuild boats? I am so sore this morning it is nuts (I work in software, not physically demanding jobs) Sure we could pay someone to do this but it would be expensive and it would take all the “fun” away.

I am going to try to finish this job today, but I have to return to work tomorrow and I would like a little bit of relaxation this weekend so I am not sure how far I will get, and of course I feel like I was hit by a train.

Did I mention I am sore?

Total time to actually cut the tank, including a 1.5″ x 1.5″ hole to attach the winch to get it out – 2 hours


Keel Tank Removal -part 1

Well like any big job in life, the first step is always the hardest. Actually taking a sawzall to the drip pan was intimidating to say the least. I mean I could have just sealed off the tank and let someone else deal with it, but once I made that first cut I was committed to tanking it out.

So I have read everything I can find on the net about removing this beast right up to cutting a giant hole in the side of the keel to get it out. I decided to take the internal approach.

Now perhaps Akupara had been neglected more so than other boats but in all honesty, although the pictures look pretty disgusting, it is just grease, oil, diesel and dirt. It all cleans up with the right degreaser. I knew from when we bought Akupara that the keel tank was coming out as there was an old badly repaired spot on the bottom of the keel from a previous running aground episode that was leaking black ooze. We had the area repaired, see a previous post, but I knew that the tank was leaking. Interestingly enough now, I am not so sure. I will be once we get it out, if I find any holes but as of this moment I am not.

Step one is to cut out the drip pan. Approximate time, not including cleaning, 15 min.

Step 2 is to cut off the tabing on the top of the tank. Again with a sawzall where it would work, but primarily with a grinder using a cutting disk. Approximate time not including cleaning, 20 min.

Step 3 I used my new hand saw to poke around to see what this dreaded foam that is holding the tank in place was all about. On Akupara, that foam is either non existent or has deteriorated to the point of non existence. What I learnt at this stage is that so far it looks like the tank is not the culprit of the leaks or the smell. The tabbing was partially peeling in places which I believe sometime over the last 40 years has allowed bilge water and probably spilled diesel and heaven only knows what else to leak down the sides of the tank and slowly fill the area, thereby dissolving the foam.

If you look closely in the picture above, this is looking down from the top of the tank approximately where the front of the engine would be, you can see the water that has accumulated in there.

At one point I had a bit of smoke or steam that was rising up from the depths and I decided to play it safe, rather than have an even bigger issue on my hands. I have seen video of fiberglass boats burning and the thought has always been put it out before it gets started or abandon ship because then it would just be too late.

One of the longest battles I had in this entire process was removing the damn inspection plate. I could not get the grinder under the old fill tube in order to cut off one screw that was totally inaccessible. The fill itself had been cemented into place with something that was a lot stronger than I. At this point I also thought damn, I am almost done, I didn’t realize the tank ended right there. (See the aluminum at the top of the picture) ya it doesn’t, that is simply one of the baffles and the tank continues up all almost into the galley. I also lost a lot of time trying to pump that sludge out to no avail. Today will be the old bucket method if all else fails.

So in all honesty the actual time spent thus far has been 5 hours. Out of that 5 hours, I spent an hour disconnecting 8 batteries that have been hidden up under the hanging locker aft of the galley in what I can only assume is the old holding tank. I needed to remove all of that to gain access to the forward quarter of the tank. I will need to crawl under the floor today and cut the remaining portion of tabbing. I also lost a fair bit of time being really careful. Lots of cutting than stopping etc in order to ensure I wasn’t cutting into the hull itself.

All in all so far there have been the usual frustrating moments and I was pretty tired last night and fairly sore this morning, but other than the dirty aspect, it has not been TOO bad. Of course I am trying to be optimistic since I have to go back today 🙂

stay tuned, hopefully the tank comes out today and tomorrow is just cleaning and grinding! :fingers_crossed:


The work begins – again.

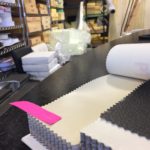
It has been a very busy time since the boat show with lots happening. We have ordered all new foam and material for the main salon, 5″ thick and the v-berth and aft cabin 8″ thick. We are going with an off white leather like material for the main salon and are still deciding on the material for the mattresses. We pick up the mattresses on Saturday! Then my evenings will be spent on sewing up the covering!

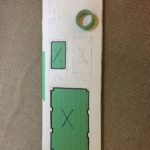
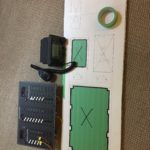
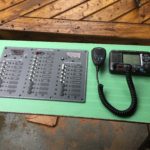
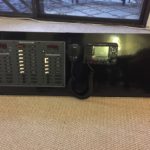
We have mounted the electrical panel and the new VHF into the electrical panel board which is designed to open in order to give full access to any of the electrical and or electronic connections. Still need to actually wire it up of course, but we are getting there. Have to go and buy a couple hundred connectors and some more wire.

I really took my time with this project as I didn’t want to screw up the door. Everything needs to be perfectly square or it will just look bad.

We made patterns for all of the cushions and mattresses, my god, the aft cabin is huge when you bring the pattern home and lay it on the carpet. The v-berth is pretty standard in my opinion. I used cheap $4 shower curtain liners from Walmart in order to make the patterns.

And finally the big news! Yes it finally happened. Yes this is the last BIG, dirty, messy, smelly job! We have purposely left this to the last as it is also going to be the most expensive project on the boat! The old engine (read mooring anchor as it didn’t run) is gone! Out, vanished, disappeared, gonzo, how ever you want to word it, it is gone!

Believe it or not, I am really excited about this huge mess!! Ya I know, I am nuts! I can not wait to get in there and degrease and clean and replace some of the old wood and paint and make this last room ready for the new engine! I still need to cut out the keel tank which I am sure is going to be a bitch, and I need to determine if the wing tanks are ok or if they need to be replaced but that is fine.

When I got the call today that the engine was coming out I actually started to get very nervous! We are committed now and things are going to happen fast! Of course it is easy when someone else does it while you are at work, makes it seem really fast! Anyway, hoping to get some good before and after shots for the blog!

Wow, February 1st already – so much to do before July!!

Back to sanding

Whitby 42 refitAs we approach the 2 year mark the Admiral is still smiling. Hmmm maybe we should buy a bigger boat?

Sometimes I wonder if we had just saved all of our dimes and nickels for all this time, we probably could have a bought a working version of Akupara by now. But then again, we would have an unknown boat with all kinds of yet to be discovered issues. At least with Akupara we will be 100% intimate with every nut bolt screw wire fixture fitting piece of wood rope material and know for sure that if and when there is an issue exactly how to fix it.

Just as we thought we were done with being dirty…

They say a picture is worth a thousand words! Hopefully these pictures will tell you what we have been up to as of late.

We have also made progress on the electrical with all of the 12v and 120v starboard wiring forward of the nav station strung, as well as a good portion of the port side. We need to run the rest of the wiring from the aft cabin to the nav station but with only 12v lights a 120v plugins, this part is easy. Next will be to wire all of the plugs and lights.

Out with the old sink
Out with the old counter
Out with the other counter
This one was a little bit stubborn
Out with the cupboards
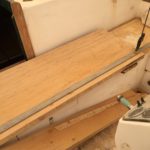
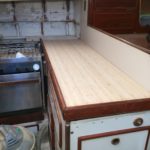
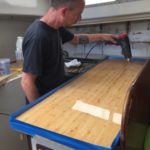
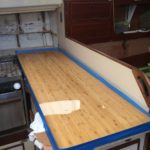
In with the new countertop
Cutting the new countertop to size
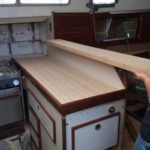
Dry fit
Dry fit
A shelf perhaps?
A shelf perhaps?
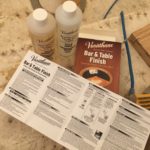
Varathane bar epoxy sealer
A bit of heat to remove the bubbles
Whitby 42 Epoxy sealed Bamboo Countertops
Now as long as they stay this shiny!

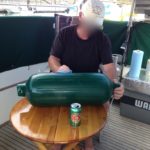
A short time ago you may remember me speaking highly of a certain Captain and saying things like “no matter what, they never seem to get dirty” well I may have made mention of a fabled rumour of polishing fenders. Ha, now I have the proof!!

Busted!
Busted!

Spare parts…

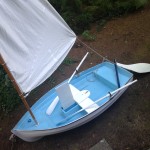
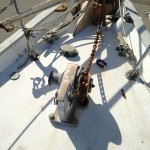
Well I am finally getting around to starting to sort through a lot of the spare parts that came with Akupara and a few things that I had in the basement as well. So far I have managed to sell my 8′ sailing dinghy and the old windlass off of Akupara.

IMG_0985

IMG_0407As I continue to sort through all of the goodies and not so goodies, I will continue to sell as much as possible. Hopefully put a little bit of money back into new goodies 😉

One man’s junk is another man’s treasure!

UPDATE:

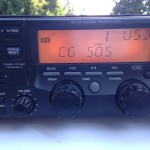
I have also sold the Icom M710 and AT130 autotuner. I kept the Pactor modem for when I purchase and install the Icom M802.

IMG_0987

UPDATE:

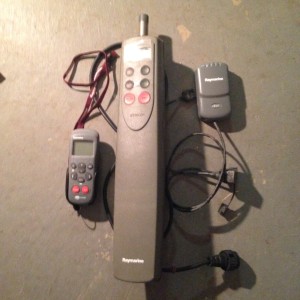
I sold the ST2000 Tiller Pilot and remote that was on Akupara as well. Not much use to us as I plan on fixing or replacing the main autopilot aboard Akupara.

IMG_0838

8 screws, 20 holes

hmmm lots and lots of holes

It never really surprises me, okay it obviously does because I am writing about it, as to how many shortcuts people will take. I have been guilty of taking shortcuts in the past as well but I don’t understand buying 10 opening stainless ports at $500 bucks a piece, ripping out the old windows, and jamming in the new ones without filling the old holes, and then wondering why your windows leak!

I will say that at least they used butyl tape and not 3M5200 to put them in…

IMG_0982

Paige and her boyfriend Fynn came to help on Saturday and managed to get a fresh coat of paint in the aft cabin, wow it is like night and day. It is of course going to get all dirty again as we continue to work on all the projects but at least it is our dirt at that point.

USB Plugs
USB Plugs

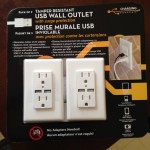
We were at Costco on Sunday and I spotted these little beauties. I had previously priced tem at Home depot and they were about $30 each but we got these for $26 for two. These ones are destined for the vberth but the more I think about it, the more I want to go back and purchase them for all of the electrical outlets in Akupara. I hate having some kind of device to charge and not being able to find the silly little wall wart.

It was extremely hot on Saturday so we did not manage to get a whole heck of a lot accomplished but it feels good to be back working at her again. I am also on holidays next week so hopefully I will be able to make some good progress. This weekends plan is to remove all of the rest of the windows and start filling some of those extra holes if all goes well.

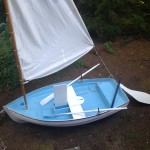
And finally I sold our little sailing dinghy last night. I had grand plans of keeping it as a backup tender and sailing through anchorages on warm days but the reality is it would be one more thing to drag on deck, one more thing to store all of the extra parts, one more thing to worry about, and we already have two rigid hull inflatables, how many dinghies do we really need?

IMG_0984


Has it really been 6 months???

https://youtu.be/swel19Kn4_o

A photo look back at 6 months of craziness! And yes it feels as fast as the video and just as confusing!! 🙂

A special thanks to all the crew for persevering thus far!

The tide has turned!

Hope everyone enjoys a look into our crazy little world! Thank heavens for the odd comedian to make it more interesting!

Cheers!

Life’s too short!

Wait a second, what? Yup that’s right, life is too short, too short to spend hours upon hours grinding and hacking and getting pretty much nowhere when somewhere in this fine world is the right tool to get the job done. 15 minutes on te internet, 15 minute diversion on the way to Akupara, 1 hour of work and the rotten ole bulkhead was finally history.

I guess I should back up a bit here and fill in some of the missing details. When we bought Akupara I had a strong suspicion that the anchor locker bulkhead was rotten, given that the chain was primarily a big ball of rust and the rode was a sopping mess and Akupara had not been in the water in several years. Hmm doesn’t take a genius to figure this one out. How rotten it actually was, I wasn’t exactly sure. So my first attempt at using a grinder was not exactly successful. It’s not that it wasn’t getting the job done, but the dust that was thrown into the air resulted in everyone leaving the Captain to deal with this issue on his own. Not until several cat calls of something to do with “Breaking Bad” and all that. The Captain wasn’t impressed.
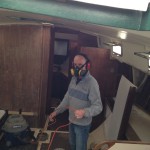
IMG_0877

Needless to say, this did not last long. I would have had to have gotten the rest of the Breaking Bad attire in order to make it threw this one, and I had forgotten my safety glasses, so all in all it was a failed attempt.

So a quick trip to Lowe’s this morning and a new power tool was on board. And regardless of what the Admiral tells you, I did not make her sit down and watch online reviews of oscillating multi tools. Ok maybe 1.
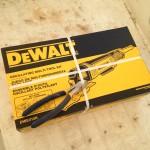
IMG_0881Dewalt won the review challenge by the way.

On several of our last boats I have done things the hard way. I have made do with inadequate or improper tools and eventually was able to get whatever task was at hand finished. I must be getting old because my patience have simply run out and in this case anyway, this tool is worth its weight in gold! I have already thought of about a dozen different ways I will be able to use this in Akupara’s refit!

Back to the bulkhead. The new tool cut through the fiberglass with a lot of ease and best of all with a lot of precision. There is a learning curve to the variable speed and the stock blades that came with it are crap as I burned out 2 of them, but I will purchase new blades next time around.

Of course like any good boat project, you must twist, contort, climb inside of, pry beat, kick, pull, push, swear, sweat, give up, cry, yell, give in, try again, and then once you have completed the entire ritual, sometimes you win.
DCIM103GOPRO DCIM103GOPRO DCIM103GOPRO DCIM103GOPRO DCIM103GOPRO DCIM103GOPRO DCIM103GOPRO

IMG_0884 IMG_0885


So, after all of that, Akupara is now one bulkhead short. In the process of all of this, it became clearly evident that either I am somewhat superhuman in strength, or the bulkhead was for the most part toast.

A couple of coats of paint later and all is good. Next week comes the fun part. Grinding, cutting, swearing, staining, fiberglasing etc etc as the new bulkhead goes in.

On another note, we have been discussing a lot of interior design ideas and the one thing we keep coming back to is installing dark corian counter tops. Since we had a can of old black paint kicking around, I decided to see what the whole dark countertop idea would look like so I painted the tops. Don’t worry, either way, the countertops were being replaced so not a big deal.

We kind of like the look. Of course it won’t be high gloss black, but you get the idea.
IMG_0886 IMG_0887 IMG_0888 IMG_0889


Add some paint and take some away.

Today was a bit of a slower day as I was by myself and went down to Akupara more to check on our progress from yesterday than with an actual plan. I checked all of our filled holes and out of all of them, I think there might be 5 that we will need to redo, not bad. I removed all of the duct tape from the inside and once again looked at the off yellow fugly paint job on the main cabin bulkhead. If there is one thing I hate it is taking a beautiful teak bulkhead and covering it with a fugly paint job. I just can’t comprehend why people feel the need to do this. I have been worrying since we purchased Akupara that there might be a big fiberglass patch or some horrible repair job that was covered with paint and there was only one way to find out.

DCIM103GOPRO

And since it was cold today I thought sitting with a heat gun might be a good way to spend the afternoon and so I started.

IMG_0865Well like any good boat project, what you originally estimate to take only a couple of hours always needs to be multiplied by 3. In this case I did beat the rule of thirds but only just.

IMG_0867IMG_0868


IMG_0869IMG_0870


IMG_0871IMG_0873


Still need to get a lot of paint out of the grain but happy to see that there is no big repair that was covered up by the paint. 🙂

Here’s to teak bulkheads!!

Filling holes.

We managed to get a lot of much needed work completed yesterday. Once again Graeme joined us, and the 5 of us set about on our tasks and we hustled for the majority of the day. Paige being the smallest, climbed into the anchor locker and painted the entire thing while August started with the second coat in the vberth. In the pictures you can see many pieces of duct take on the ceiling. Each one of these is preventing epoxy from flowing through into the cabin and will be removed.

August painting
August painting
Paige painting
Paige painting

Andrea went to work with wood filler and sealed about 200 tiny screw, nail, and other such holes in any of the wood that will be left exposed. I asked Graeme to start by over-drilling any of the holes on deck that I had missed and I started mixing epoxy. Graeme soon ran out of holes to drill and he joined me in mixing and pouring epoxy.

Filling holes with epoxy
Graeme filling holes with epoxy

As the day progressed, Andrea ran out of wood holes to fill, so she went and applied a second coat of paint to our bruce anchor, At least that is what she told us she was going to do.

See, the admiral has the uncanny ability to strike up a conversation with anybody and in my opinion, maybe get a little distracted from what she is doing at the time. She on the other hand, always reports back that she has been performing research, or learning the ways of the locals, or making a future needed connection. She also has this way of explaining it to you with a heavy serious tone that makes it sound like she has been on some sort of secret spy mission and the outcome of that conversation will help to save the world or some such thing. Yet typically, the look on her face when you catch her, gives away the perhaps not so obvious motivation behind said spy mission. Proof in point, Take a look at the picture – facial expression – serious with a note of oh crap – busted! Sky behind – hmmm turning blue. A bit of shadow in the picture – hmmm warm sun perhaps?? 😉

Saving the world again I see?? ;-)
Saving the world again I see?? 😉

I will add that Graeme and I were on deck filling holes with epoxy and had heard every bit of conversation for the last half hour at least.

August and Paige ran out of places to paint and joined the epoxy crew on deck, and eventually Andrea did as well. So the net result of our day is that every hole on the cabin top, both aft and main, have been drilled, and filled with West System epoxy and structural filler, we have a 2nd coat of paint on all of the areas we previously painted, as well as on the bruce anchor, all immediately visible holes in the wood bulkheads have been filled, and I managed to start filling some of the holes on the interior exposed fiberglass. We are almost at the point of being watertight!!

Holes left to drill and fill with epoxy – all of the stanchions, chainplates, and about 5 deck fittings that are giving us a hard time. As well, we still need to address holes on any vertical surface, as I only had slow cure epoxy hardener which would have resulted in a huge mess. As well, we need to cut wooden plugs to fill the instrument cutouts in the cockpit beside the companionway so that we can epoxy and glass them over.

Amazing what a coat of paint will do…

Well, so much for best laid plans. I don’t think we ended up doing anything on our list of to do’s over the weekend but we did get a fair amount of work done nevertheless.

I think it is time that we just give in to the fact that in order to make ourselves feel better, and to provide a solid starting point, and to truly make Akupara ours, we need to completely finish stage 1.

Neither one of us has admitted how much the dirt and grime has been bothering us, that is until we made the first brushstroke with fresh paint! Wow what a difference! Now we are on a mission and I think we will focus on this aspect until it is completed.

So on the weekend we set to work painting all of the never seen areas of Akupara’s v berth and part of the main salon. Never seen areas as in behind the wooden ceiling in the vberth, and inside all of the hanging lockers and cabinets in the foreward head. We have not started painting the actual interior liner yet, that will come later, as well as the bilges, which are surprisingly clean.

This was not technical precision painting with delicate lines and lots of masking. This was get as much paint on as possible to give all of the dark recesses a fresh new look, and at the same time I guess it could be called the last stage of the cleaning process. 2 more coats coming this weekend, and hopefully the rest of the hidden areas in the main salon.DCIM103GOPRODCIM103GOPRO


I am not going to post too many pictures until it is all finished and then I will do the before and after thing.


As of late…

Well, you may have noticed that we have been rather quiet for a while. Our apologies for that. We have been extremely busy in other areas of our life and the this site has suffered as a result. We have been working on Akupara whenever we can, and we have managed to make a fair bit of progress. So I will give a quick summary of where we are currently at.

90% of the electrical has been cut out. The anchor locker and vberth have been completely stripped and pressure washed, and are now ready for paint. The main cabin and the aft cabin are ready for pressure washing. We did pressure wash the complete deck as the dust and dirt were getting too much. All of the interior removable pieces are now in our basement. 90% of the deck fittings have been removed and the holes for all of the screws and bolts have been drying out in preparation for drilling them oversize and filling with epoxy. Half of all of the interior panels have had the backsides painted with 3 coats of paint to give them a fresh clean feel. We have a few more things to remove before the official rebuild starts, as in the rest of the plumbing and electrical need to come out still and the stanchions need to be removed (they are currently supporting the frame for the cover, so we need to figure out how to remove them without bringing down the top). And of course the dreaded job of sanding all of the decks still needs to be completed. This being Easter weekend and us having 3 days off will definitely help and fingers crossed, but we should make a fair bit of progress.

Possible chores for this weekend include: cutting out existing anchor locker bulkhead as it is rotten. Cutting out the foredeck to begin repairing the soft spot. Painting the v-berth and anchor locker. Painting the remainder of the interior panels. Sanding all of the interior wood.

Check back over the weekend as I will try to update our progress at the end of each day.

Bath time!

Akupara is the third boat we have owned that has had a wooden ceiling on the hullsides. I love the look of the wood and how it brings a feeling of warmth to the cabin. Akupara is also the third boat we have owned that it is obvious that none of the previous owners have ever removed the ceiling to clean behind it.

The ceiling in Akupara’s v-berth is like a lot of other boats in that it is comprised of approx. 4 inch wide strips of wood that are screwed to the side of the boat in one fashion or another. Of course there are tiny gaps between each of these slats where detritus from past years will accumulate. I realize we all like to think we are clean but in reality it is impossible to be spotless and eventually the empty space behind your lovely wood ceiling will begin to take on a life of its own. If you own a boat with nice wooden slats running down the interior of your cabin, take a Saturday morning and remove them just for fun. Typically there are only a few screws holding each slat so it isn’t a huge endeavour. You may be surprised at what you find.
https://youtu.be/Za2llAwM1oo


New versus old

We are leaning more and more towards replacing critical components with all new systems. Originally we considered keeping the engine and having it overhauled but as we get farther and farther down this path, we are leaning farther and farther towards a new one. This same thought process is happening with everything on Akupara.
Some would argue why spend all the extra money when you can save a bunch by fixing and reusing what is already there. I agree with this thought process completely but, the last thing I want to do is to be in a nice tropical anchorage and be worrying about my 45 year old engine, or the 45 year old wiring that is behind the walls and that I can’t see.
This is going to be our last big boat and we plan on keeping it for a very long time and we would like to have as many years as possible without having to worry about old systems.

The other side of this is that yes we could keep the existing engine and have it rebuilt, but how long will it take to spend $5000? I would guess that the starting price at rebuilding is close to that, and it wouldn’t take long to be creeping up to the $10000 price range. One or two major problems after that and we have just spent the cost of a new engine, on a 45 year old engine.

This of course opens up a whole other can of worms as now we are going to have to start thinking about fuel tanks as well. If the engine comes out, we might as well replace the 3 tanks while we have the access rather than discover a problem a year down the road.

We are still trying to feel our way through this decision process, but all of the indicator lights are currently pushing us towards going all new. And hey, in the end we will have a brand new 1976 Whitby 42, how many people can say that? 😉

Now, I need to start offsetting the cost of the new engine so who needs parts for a 60hp Ford Lehman ?? I will even consider selling the engine whole for $800, if you pay the costs associated with removing it!

Captain’s Orders

The weather in Vancouver has been great the last two weeks and yesterday it was a true spring day. We made it to Akupara shortly after nine, with a full crew plus one and by midday we were working outside in the sun and the solar panels were actually putting a bit of juice into the battery bank.

Graeme,  August’s boyfriend, came along after graciously offering his help and my accepting. We have known Graeme for a couple of months now and he is a great kid! It was a very nice change having a young man aboard and I took the opportunity to use his strength to assist with a few things that I had been putting off. I made my way into the engine room and Graeme followed. We tried to trace the water maker plumbing and eventually gave up and just started cutting the hoses. After many contortions and maneuvers we successfully removed the entire system and one of the old starting batteries that was slowly self destructing.  Now with me being the farthest into the engine room and Graeme basically blocking the door, there was no way that I would be able to lend a hand to the ladies without having Graeme move, climbing out of the engine room and making my way to wherever the issue was, so Graeme took up the role and did a great job. As we were removing bits and pieces we could of course hear the goings on in the rest of Akupara and the feigned attempts at removing difficult screws and what have you. After what seemed like an eternity, I asked Graeme to go see if he could help and off he went. Within 30 seconds he was back and the issue was resolved. Hmmm, I might need to keep this guy around!! 🙂

I am teasing of course, a lot of times the issues do boil down to strength, however, normally speaking the Admiral and the crew manage to successfully perform any task they take up and perhaps at times they may try a little harder than I would just to make the point. Of course it does help to prod them along with “girl” comments 😉

So anyway back to my story.  August is a lot like myself and when she attacks something, she is either 100% or not at all. The last couple of weeks she has been extremely helpful and accomplished a lot of work. As we have been stripping the wiring, this is what the ladies did while Graeme and I were in the engine room.

Before we started yesterday I basically gave everyone a primer that went something to the effect of cut and remove any wire that is not grey (part of the auto pilot), or the larger white ones(GPS antenna wires) the rest are fair game including the AC wires as I specifically had not plugged in the shore power.

Occasionally there would be a call of “Dad, what about the green/blue/black/purple one that goes into/under/over this “thingy”?

Now, I have looked at every wire and every square inch of Akupara so far and I will say that I have a pretty good idea already of what is where, but when I am sitting inside the engine room beside the port fuel tank the only point of reference I have is to listen to where the voice is coming from, and based on that plot a line of position to where the individual is. From that estimated position, I then try to ascertain what said “thingy” is and thereby deduce which wire is currently confusing them. I am pretty good at it after 19 years of marriage and 16 years of having kids, so the majority of the time my answers were  a precise yes or no and this system worked very well, or so it seemed.  It also helps that there were only 3 different wires that I actually wanted to keep but there is no need to tell anyone that.

At the end of what I thought was a very fruitful day, I was making my rounds through Akupara prior to locking up and identified two little points of miscommunication. The port solar panel wire, which I do admit is black and red had been cleanly severed and to my amusement so had the main shore power cable from the back of the receptacle to the panel. The answer given when the question was asked was, “You said to cut all the black wires!” Damn.

I also recall the exact moment that the shore power line was cut and I also recall giving a firm yes when asked the question as it went something like this. Dad, what about the big black wire that goes through the cupboard. Based on my plotting I ascertained that August was at the starboard dressing table, which may have been a degree or two off. I also recall Graeme going to help with the big wire cutters. I also recall not clearly explaining that I wanted to keep the shore power available so that I could charge the batteries. 🙂

Oh well, it was going to come out sooner or later anyway.

Summary of yesterdays work:

Water maker removed (identified another area of rotten plywood between the engine room and the aft head)

IMG_4895IMG_0816


All electrical wiring from fore and aft of engine room removed. Rudder gudgeon removed and cleaned (appears to be okay to reuse, corrosion was isolated to the nuts and bolts)

IMG_0810IMG_0814


Navigation station dismantled.

IMG_0819


Shore power cut. 😉

Shocking…

We have been pretty busy as of late which has kept me away from updating the blog, so my apologies. The last two weekends have been spent continuing to remove the interior panels, bringing them home, and now the electrical stripping has begun. I figure we have one more trip to bring home the rest of the pieces.

IMG_0800IMG_0801


So far we have managed to remove all of the 12 volt wiring, as well as the 110 volt wiring on the starboard side,  from the nav station area forward. The port side is back to the main cabin bulkhead between the foreward head and the main cabin. It is amazing how long it takes to actually get this stuff out. The old electrical boxes are badly corroded and the majority of the screws are pretty rusty. The AC wiring is some of the thickest, most hard to cut stuff I have seen in a long time, but seeing as how it is 38 years old, it has to go. Which means that even with all of the interior panels out, we still need to twist and contort to odd angles and positions in order to remove it. It is fastened very well! We have also had to go a little bit deeper into the removal of panels than I was originally intending, but hey, in for a penny, in for a pound!

IMG_0803

Over the last couple of months the battery bank has slowly gone down more and more so on Sunday I decided to try to charge it a bit using a standard automotive charger seeing as how the electrical is 1/4 gone and I have loose wires hanging everywhere, I am unable to plug in the shore power of course. The little charger managed to put a bit of life back into the batteries, we will see just how much this weekend. However it gave me enough that I was able to pump the bilge out, and just for the hell of it, turn the ignition key.

The good news is that the engine turned over – barely. So at least we know that it is not seized and that the starting system is correct. if we decide to try to keep it, we have are a little farther ahead, but it will obviously require a lot of TLC before we try to start it for real.

Our basement is slowly becoming inhabitable. It is filled with more boat parts than I care to mention and at some point we are going to need to take a boat day, and use it to organize the basement so that we can start making some progress on rejuvenating all of the bits and pieces.

I am eagerly awaiting for the day when we have enough of the interior removed and stripped away, that it makes sense to pressure wash inside to remove the years of grime and filth. Almost there I think, not counting the engine room yet.


Water, water, everywhere…but not where it should be!

To all boat owners everywhere. If you have a deck leak, please take the time to address the situation properly to prevent unnecessary damage!

Akupara was built in 1976. That makes her 39 years old. We expect to find issues considering her age and that there have been several previous owners, which is why we are doing a complete rebuild which includes completely gutting the entire interior, electrical, plumbing, and mechanical. Had we just launched her as is, we would never have been aware of some of the more serious issues that we are slowly discovering. We knew we had a large foredeck repair coming and since then have discovered that the anchor locker bulkhead will need to be completely replaced, and yesterday as August disassembled the aft cabin, I had my first really good look at the mizzen main chainplates. The chainplates themselves have been replaced which is great, but they will need to be removed, and I will need to perform some surgery on the aft head bulkhead and aft dressing table bulkhead. It seems that whoever did the replacement, removed the old chainplates and discovered some wet plywood in the bulkheads. Rather than completely cut out the wet wood, and glass in a proper repair, they simply used a hole saw and drilled a bunch of holes enough to chisel out the immediate area of the chainplate, used some kind of a block of plastic and reattached the chainplate. I was stabbing it with a screwdriver to try to identify how big of an area will need to be fixed. Prior to that, it actually did not look that bad.

IMG_0775Thankfully, the actual knee that the chainplate is bolted to, which is on the other side of the bulkhead, seems to be solid and dry so the repair will be limited to replacing a portion of the bulkhead only. As well, the repair will be hidden inside the upper lockers in the aft cabin as since it is a rather tight area to get to, the repair may not turn out as visually pleasing as I would normally like. This does allow for a more robust repair though, which is good.

IMG_0776So, we have some more grinding and glassing to do but when we are finished, it will be as solid as it was originally. Did I mention that we will be using all marine grade plywood for repairs? Household plywood has absolutely no place on a boat.

Oh and there is also a very good look at some of the condition of the deck fitting bolts. You can actually see water dripping from one bolt. These are for one of the stanchions which we have not removed as of yet.

For those of you who have been following along, you may be wondering why we seemed to switch to dismantling the interior. We decided that we needed to gut the interior as soon as possible to allow Akupara to thoroughly dry out inside. All of the “pegboard” that lines the hull inside the lockers is simply trapping moisture, and hiding cockroaches 😉 and needs to be removed asap and given a chance to dry as well as quite a few pieces of wood.