Why you should fix deck leaks…

Rotten coring
Rotten coring

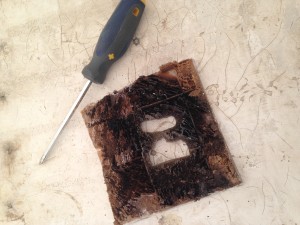
I knew the chainplates leaked. I also knew they leaked fairly badly. What I did not know was that the area of deck where the chainplates make their appearance is cored. I also did not know that the original way these holes were created did not include sealing the coring. Well, it did not take long to find all of this out.

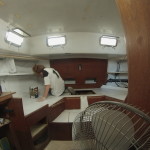
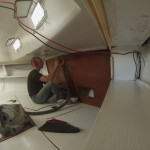
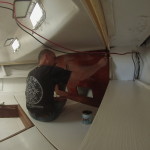
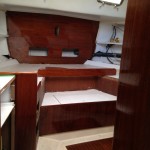
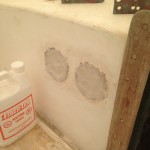
I decided yesterday to start pulling the chainplates in the aft cabin before we get too far ahead of ourselves and to fix the rot in the bulkheads. Fixing the rot in the bulkhead is not going to be that big of a job, but nevertheless I have been putting it off, however the decision was made to begin the fix which necessitates removal of the chainplates. First thing I noticed right off the bat was that the bolts holding the chainplate in place, were not even tight. Hmmmm. Second thing I noticed was that there was several layers of what I can only assume was 3m4200 or something very similar. Of course the 5 spare tubes we found in the cleanout also indicate a preference to this goop. Anyway, after cleaning out as much of the goop as possible, and removing all of the snug bolts, I pried from below decks and Andrea pulled from on deck and sure enough they popped out. This of course presented me the opportunity to discover the facts above. It became quickly obvious that an immediate repair was needed, and it became quickly obvious that I can be almost guaranteed that every other chainplate will require the same repair.
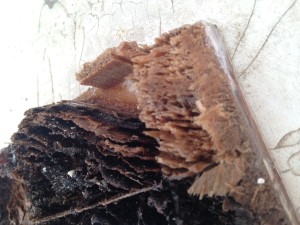
Rotten soaking wet end grain balsa

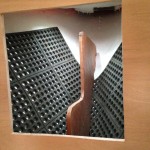
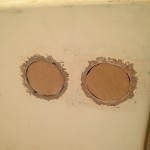
My repair process involved cutting out approximately 5″ square of the top skin around the existing holes. As soon as I began cutting the top skin it was painfully obvious that there was water damage. There is a smell that rotting wood has it and it was in the air. In the pictures you can see black core, which is already rotten and the somewhat light brown colour is wet. After removing this piece of top skin I scraped all of the remnants of coring out of the hole, ground it down with 60 grit sandpaper and cut a plug out of 3/4″ marine ply to fill in the section of now missing core. The original thickness of the coring here is closer to 1/2″ which means that my plug is almost flush with the top skin. This is by design so don’t panic. I placed a small piece of duct tape over the original holes on the bottom skin to prevent epoxy from running down inside of the boat, filled the areas that I had dug out underneath the remaining top skin, poured a bed of thickened epoxy into the hole, and placed the new coring in, completely covering it with epoxy. So now I have a solid area about 6″ square around the old holes.

The next step will be to grind the area concave including farther out than the 5″ piece I cut out in the top skin, drill a hole about 3″ in diameter where the chainplates will be through the plywood coring down to the bottom skin, fill the hole completely with thickened epoxy and add a layup of several layers of glass to the entire area until it is slightly proud of the surrounding deck. At this point I am going to take it one step farther. I am going to raise the 3″ diameter hole that has been filled with thickened epoxy, up past deck level by approximately a 1/2″. This will help eliminate any water intrusion as any water that finds its way on deck will run around the raised area. The purpose of the 3″ solid epoxy hole is that any water that might find its way down the chainplates will not be able to penetrate the coring as they will be surrounded by solid glass.

I only have to repeat this 9 more times for the rest of the chainplates and all will be good in the world again. But I will never have to repair these areas again.

A word of advice to all of the Whitby owners out there. Pull your chainplates, and make sure the coring around them is not wet. If it is not, at least seal the holes with epoxy and make sure it never does get wet.

While I was messing around with pulling chainplates and repairing core, I also replaced all of the temporary screws that were holding in any of the interior panels that we have put back. As I mentioned before in previous posts, every screw that is used on Akupara from here on in will be a Robertson screw. For those of you who do not know what a Robertson screw is, it is a square slot as opposed to just a slot, or a Philips which is a star shape, or any other type of screw for that matter. I have always found Robertson screws afford the best chance of NOT stripping them thereby making them removable for all time.

Andrea and Paige began the process of painting all of the bilges and lockers with Bilgekote paint. Andrea wanted white as opposed to the traditional grey, and after seeing the newly painted areas gleaming with fresh white paint, I think she made the right choice. Bilgekote is easy to apply and gives good coverage. It is also very hard once cured and is supposed to be very abrasion resistant. We actually started asking ourselves why we shouldn’t use white Bilgekote to paint the sole in Akupara as well. Abrasion resistant, tough, white, what more can we ask for? I will need to do a little research to see if there is any reason why we should not, but if I do not find anything, I think we have a solution to the 40 year old yellowish floors.


Perfection?

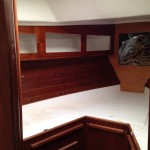
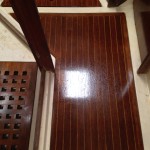
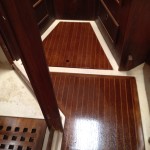
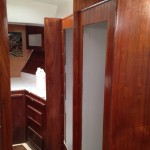
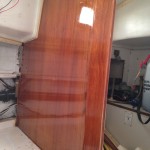
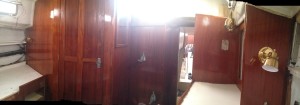
As I have been reviewing the pictures that I have taken over the last little while, I notice that not all of the finished parts of the interior wood are exactly the same and that there are some spots that are a little darker or lighter than others and I thought I should provide an explanation as to why.

Firstly I am not a professional furniture refinisher. Perhaps if I had contracted out the work, the wood would be a little more uniform in colour throughout. I am sure if I paid enough for it, it could be close to perfect. As close to perfect as the day it came out of the factory.

But secondly, Akupara is not brand new. Akupara has almost 40 years of experience under her belt. She has battle scars like any other 40 year old. She also has 40 years of stories to tell about those battle scars. A lot like me. I have a crooked middle finger on my left hand and there is an entire story I get to tell about crushing that finger in a compound sliding miter saw while attempting to cut one of the hardest pieces of wood I have ever seen.
In hindsight, I guess I could have had some kind of cosmetic surgery where they attempted to straighten out the bone, but was it necessary? I can use the finger perfectly fine, just ask many a driver in Vancouver who have cut me off in traffic, so no I do not feel it was necessary to make it perfect, and I have a pretty good story to tell when asked about it. Not to mention that in order to get the full visual, I have to stick my middle finger up at the audience, which is just a fringe benefit. 😉

So when it comes to the wood refinishing in Akupara. Yes we have filled as many holes as we need to, and yes we have sanded the old faded finish off, and yes we have re-stained it, but no it is not perfect. You can still see the lines and battle scars that Akupara has earned and each of which I am sure has a story to go along with it. Soon enough, we will undoubtedly add some of our own scars to her, and for those we will have a story to share, but for the others, Akupara will get to hold her past as her own and we will accept her for who she is now, along with all of her life experiences to which she should be proud of.

The Aft Cabin coming along

Backup plan?

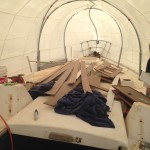
So I am sitting on Akupara surrounded by dust and bits and pieces of boat, under a white shrink wrap greenhouse. It is 9:10 in the morning and I am already sweating and I haven’t started working yet, and a question keeps going through my mind based on a comment I saw on TV last night.

The comment was from a famous movie star and she was being asked how she got her start in the industry and she went on to tell the interviewer about her start and summed it all up with a final comment to the effect of she never really had a backup plan.

I can relate. I don’t have a backup plan either. I guess the backup plan would be to sell Akupara, downsize to a small apartment when the kids leave and spend the rest of our days living the dream. What that dream means to me is perpetual punishment and I am unable to wrap my head around it which I guess also means I would spend the rest of my days depressed and angry for never having accomished MY dream.

The interviewer remarked to her that is the only way to go if you truly want to be successful at something and it obviously worked for her. Here is praying that it works for us as well.

And with that, back to work, on my “backup” plan.

Too hot…

It has been one of the nicest summers we have had in a long time and we are not in the water, go figure. It has also been way too hot to work on deck under the greenhouse! So that has left interior work to be completed which is fine as it will all need to be done sooner or later anyway.

On Monday Paige came to lend a hand and she set to work painting another coat on what she and Fynn had completed the week before. Although I am sure it will continue to get scuffed and dirty as we progress and require another coat, it is sure nice to see what Akupara will eventually look like.

Paige painting the aft cabin.

Tuesday to Thursday I was by myself and managed to get a lot accomplished. I was able to sand and stain a lot of the interior wood in the foreword and aft cabin.

Sanding the aft bulkhead in the aft cabin.

So what did I use? Well, part of the overall plan for Akupara is to be as maintenance free as possible and to  that end I went with Natural Teak Cetol and Clear Gloss Cetol.

First coat of Cetol
First coat of Cetol

I know, I know. OMG. I didn’t use varnish or hand rubbed finishes or mother of pearl or whatever else, but think back to my last statement. Low maintenance. If I get a scratch, I simply have to do a light sand, put a coat of Cetol and then a coat of gloss and I am done. Every couple of years when it starts to look faded, the same applies. It also means that I only need to keep 2 cans of product on hand at all times. IF we have any wood on the exterior, and that is a big IF, it will also have the same products on it.
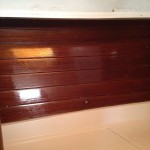
And yes Joe, I said gloss 😉 even though you don’t like glossy boats. So far I think it is looking pretty darn amazing considering the state it was in when we purchased Akupara.

Starting to look like a boat again.


I challenge all of you javex bottles to sand your interior wood with 120 grit sandpaper and have any wood left at all. Gotta love 40 year old boats when the teak ply was still made with some meat and not just paper thin.

IMG_0999

Speaking of sanding, mu random orbital sander bit the dust so I went out and bought a Dewalt Random Robital Sander that accepts a vacuum cleaner hose. Gotta say I love it so far. The amount of dust that escapes is minor to say the least and the majority of it ends up in the vacuum.

IMG_1006


I am coming up to a dilemma though and anyone with any experience doing this I would love to hear from you. I will soon need to repaint all of the fiberglass sole. Right now it is a horrible yellowish colour and it needs to be white.  I have asked several folks but have yet to get any good advice. I do not want to sand as that would destroy the nonslip.

IMG_1007

Another thing I love about these old boats is that all of the panels can be removed by simply unscrewing them. As I come back to do the electrical  and plumbing work, this will make it a lot easier.

Still need to add in some trim.

So the current plan is to continue refinishing all of the interior until it begins to cool down and then we will get back to working on the deck. As well, this will give us a big sense of satisfaction and help to clean out our basement.

Shiney!
Shiney!

“That guy”

"that" guy.
“that” guy.

Sometimes I really have to wonder about myself and why I seem to attract certain kinds of people. I also have to wonder to myself, what makes these certain kinds of people want to share their advice with me.

Let me back up and shed a little light on this.

Every boatyard, marina, yacht club, coffee shop, bar, and workplace has one I am sure of it. You might even know the guy. He is by all appearances a nice guy, non threatening, somewhat likeable, apparently happy and on and on. It isn’t until he opens his mouth that you begin to scratch your head.

If you are talking about jet planes he will very quickly interrupt and immediately dominate the conversation sharing his vast personal knowledge and expertise on jet planes. The fact that he has never flown makes no difference. He is the worlds authority on jet planes. Well, this is equally true for boats. There is always “that” guy, who knows more than you ever will, who has more experience than you ever will, and will always be, well let’s just use the word better than you. If you are doing something in an A-B-C fashion, he will quickly point out, and have some kind of story to prove it, that you are doing it wrong and it should be done in a B-A-C fashion.

I have once again attracted “that” guy. I was on holidays this week and spent a considerable amount of time in the boatyard working on Akupara and low and behold, “that” guy spotted me. He seemed friendly at first but within minutes he set out to prove how much more he knew than I.

Look, I do not pretend to know everything. If you scour my blog I challenge you to find one place where I have stated that I knew more, was smarter, or was just all around better. I guarantee you that you will not find it because I know it is not there. The entire purpose of this blog was to record the process of rebuilding a Whitby 42 in order to measure our own progress, share with family and friends, meet other Whitby 42 owners and perhaps start a dialogue about projects where we could share our knowledge. I also thought that maybe, just maybe, someone who is considering attempting a project of this size might either find inspiration, learn something new, or wise up and not start it to begin with. I did not start it to mesmerize the world with my greatness. Will I make mistakes, of course, who doesn’t. Will people offer valuable advice, of course, and I will take it into consideration. But ultimately this is our boat, our project, and we will do it whatever way we decide to do it and the outcome will be ours alone.

Several years ago at the marina, I met another “that” guy. I was planning on going offshore with my Alberg 30 at the time and the boat was obviously being set up for just such a trip. Well, “that” guy came along and proceeded to tell my a hundred reasons as to why I would be stupid to attempt it, hurricane winds, 60 foot waves, and I would never be able to complete it. Turns out that he has never been offshore, and basically has never been out of the marina. When asked about his adventures on the high seas he quickly went off to tell me all about his missed opportunity in life and how it was somebody else’s fault. Last I heard of him he ran his boat aground just outside the marina and had a nice hefty insurance claim to make repairs. Of course, the rock that he hit was never, had never, and will never be on any chart.

So back to the original question. I wonder if it is me or something about me that attracts this type of personality or is it just so common that it affects everyone? I am not sure but I think my Summer Resolution is going to be to immediately call bull shit from now own, and get on with my project.

At some point, someone may realize that I do actually have a grain of knowledge about what I am doing, and I do have a plan on how to get it done. I may not be right, and I am sure there are a 100 better ways, but let’s just agree that if you are going to start impressing me with all of your knowledge, I am going to call bull shit and walk away. So in order to avoid the potential uncomfortable moment, perhaps save it for someone else.

That being said, if you are looking to share, please go ahead, if you are looking to impress, move on.

Damn, I really need to get Akupara out of this boatyard and into the water before I turn into one of these guys who’s boat keeps getting moved farther and farther to the back of the lot, or the Boulevard of Broken Dreams as I like to call it.

In case you are interested, there is a short video that can be seen. It isn’t the greatest, but it will definitely give you an idea of where Akupara is and the company she is forced to keep at the moment.

https://www.youtube.com/watch?v=C2maxxGLL8Q


Scary days ahead, but all part of the plan!

No Smoking

I have a very scary anniversary coming up in August and I cannot allow myself to reach it.

30 years ago on my 15th birthday I was caught smoking cigarettes and I have been a heavy smoker ever since. I do not remember exactly when I took my first puff, but the day I was caught sticks in my mind. I was young, active, healthy, heavily involved in Martial Arts and yet I started smoking. I still do not know why I started, it wasn’t to be cool or to fit in or any of those reasons but regardless I did start and the time has come to stop.

In my build up to this I have read a lot of material and one of the things that is repeatedly stated is to tell everyone you know, so what better way than to announce it here.

I have set a quit date of Wednesday July 29th, 2015. I will be successful.

How does this fit in with rebuilding a Whitby 42? Easy, if I do not quit, I will probably be dead a lot sooner than I am planning on and that would just make for a shitty ending to this blog. After all, the goal is to complete the project and someday sail off into the sunset isn’t it? Kind of hard to do dead, or with an oxygen bottle or with any of the other possible outcomes.

Did I mention that the Admiral will be out of town for a week and August is away at camp.

Paige – I would advise that you find something to do, consider this fair warning, run, run now while you still can 😉

Spare parts…

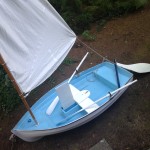
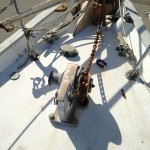
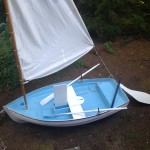
Well I am finally getting around to starting to sort through a lot of the spare parts that came with Akupara and a few things that I had in the basement as well. So far I have managed to sell my 8′ sailing dinghy and the old windlass off of Akupara.

IMG_0985

IMG_0407As I continue to sort through all of the goodies and not so goodies, I will continue to sell as much as possible. Hopefully put a little bit of money back into new goodies 😉

One man’s junk is another man’s treasure!

UPDATE:

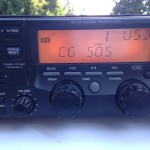
I have also sold the Icom M710 and AT130 autotuner. I kept the Pactor modem for when I purchase and install the Icom M802.

IMG_0987

UPDATE:

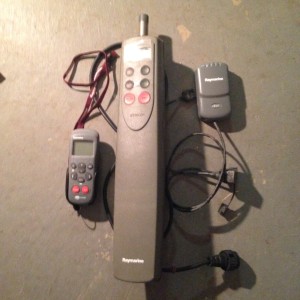
I sold the ST2000 Tiller Pilot and remote that was on Akupara as well. Not much use to us as I plan on fixing or replacing the main autopilot aboard Akupara.

IMG_0838

8 screws, 20 holes

hmmm lots and lots of holes

It never really surprises me, okay it obviously does because I am writing about it, as to how many shortcuts people will take. I have been guilty of taking shortcuts in the past as well but I don’t understand buying 10 opening stainless ports at $500 bucks a piece, ripping out the old windows, and jamming in the new ones without filling the old holes, and then wondering why your windows leak!

I will say that at least they used butyl tape and not 3M5200 to put them in…

IMG_0982

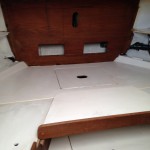
Paige and her boyfriend Fynn came to help on Saturday and managed to get a fresh coat of paint in the aft cabin, wow it is like night and day. It is of course going to get all dirty again as we continue to work on all the projects but at least it is our dirt at that point.

USB Plugs
USB Plugs

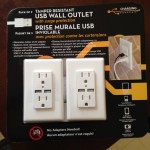
We were at Costco on Sunday and I spotted these little beauties. I had previously priced tem at Home depot and they were about $30 each but we got these for $26 for two. These ones are destined for the vberth but the more I think about it, the more I want to go back and purchase them for all of the electrical outlets in Akupara. I hate having some kind of device to charge and not being able to find the silly little wall wart.

It was extremely hot on Saturday so we did not manage to get a whole heck of a lot accomplished but it feels good to be back working at her again. I am also on holidays next week so hopefully I will be able to make some good progress. This weekends plan is to remove all of the rest of the windows and start filling some of those extra holes if all goes well.

And finally I sold our little sailing dinghy last night. I had grand plans of keeping it as a backup tender and sailing through anchorages on warm days but the reality is it would be one more thing to drag on deck, one more thing to store all of the extra parts, one more thing to worry about, and we already have two rigid hull inflatables, how many dinghies do we really need?

IMG_0984


Scuba…

What the hell does scuba have to do with rebuilding an old boat?

Well a lot more than you might think actually.

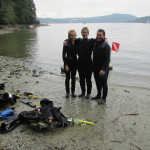
Tomorrow we are going to finally get back in the water. Not with a boat of course but with scuba. All of the family are certified open water divers and we really enjoy the few times we have managed to get out. Part of the grand plan is to have the ability to dive whenever and wherever we so desire. Of course this necessitates owning our own equipment and we are partially there, but we still have a long way to go.

Although scuba diving is considered a sport or a hobby, I actually consider it a safety skill. In the event that we need to clean the bottom of Akupara, or make an emergency repair underway, with scuba we have that ability. I figure that the I overall cost of owning our own equipment will be offset by the dollars saved in not having to haulout. And who knows, maybe we will even be able to make a few bucks diving on other peoples boats, or retrieving that priceless Rolex that was dropped off of the mega yacht when they reached for the glass of spilling champagne! 🙂

Paige and Derrick

Paige, Andrea and Joe

A small restart.

Yesterday I managed to finally get restarted on Akupara!!

As I thought I was a bit disorganized as we have definitely lost our rhythm. Oh well, I managed to get some more painting completed, I did a fair bit of organization of tools that had managed to grow legs and hide all over the boat.  I also got the upper cupboard reinstalled on the starboard v berth. Amazing how you can remove a bulkhead and replace it with a new one in the exact same position and yet somehow the next piece is just a little too big. I absolutely love my oscillating multitool, it comes in so handy in so many different ways and this time I used it to make precision trims of the cupboard!

Since we are starting to close things back in temporarily, it all needs to come back out for the sanding of the liner, I also started making the wiring harness for the new windlass. Akupara came with just enough heavy duty new wire to get this done.

My random orbital sander has died and will require a replacement or two as we will need it in order to continue.

And last but not least we have a few stowaways. A lovely little nest of wasps has taken up residence under the shrink wrap.  I will destroy the little stinging bastards this week!

We are in the middle of a heat wave in Vancouver right now but thankfully inside Akupara is not that bad, but it is almost impossible to work under the shrink wrap on deck. The only advantage is that Akupara is as dry as a bone.

Storage

Well it may sound a little strange to anyone who knows the Whitby 42 but in my opinion there really is not a lot of room for storage. I guess for the weekender or the occasional week long traveller there is ample storage but for the liveaboard, there does not seem to be a heck of a lot. Don’t get me wrong, there are lots of nooks and crannies, cupboards and drawers but when you really start thinking about all of the spare parts, clothes etc that a liveaboard needs, it starts to get small real fast. So, one of the things that we are going to try to do as we refit Akupara is to find plastic storage boxes that fit in all of the spaces in order to remain somewhat organized.  The ultimate solution would be to have some kind of custom made containers that fit to the curve of the hull in the lockers as an example but I would not know where to get such a thing and I do not know how to weld plastic so that will not happen unfortunately. We like the Rubbermaid type containers.  They keep clothes dry, and spare parts organized but we have also used those vacuum bags for larger soft items like blankets and they work great if you have a vacuum handy.

It is strange tackling a project this big as your mind is all over the place at times, especially after being away from it for a while. Back down today to start getting back into the swing of things.

Back to work, okay maybe tomorrow…

As my previous post mentioned, we had a family situation come up that took up a lot of our time. My uncle was hospitalized here in Vancouver and my cousin Martin came to stay with us for what was supposed to be a week or so. Well, as with everything, especially boats, all original time estimates  need to be tripled at the minimum. So in this case we were able to share our home with Martin for almost a month. He is a fantastic guest and although it was a difficult time, with a lot of worry, we did manage a lot of laughs and perhaps shared a beer or two once in a while.

We are sad to see him go, but are sure that he is anxious to be on his way.

Start checking back again as the updates should start coming in as we settle back into our routines and get back to work on restoring Akupara.

Priorities

We have been rather quiet lately due to a family situation that is taking up a lot of our time. One of the things that we have learnt through our boating lives is that a big part of it comes down to how important family is and in this case, Akupara will have to simply wait until we have a little more time. Stay tuned as we should start getting back on track in a week or so.

Everyone needs a little time away…

Well after pulling my back pretty good almost three weeks ago, spending a week working from home on the couch, and spending a boy’s week in Mexico catching up with an old friend, it is time to get back to work on Akupara. I am looking forward to getting going again and the arrival of some new parts while I was away, has inspired me a little more. Come on Saturday!

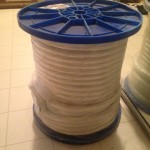
New rode
New rode
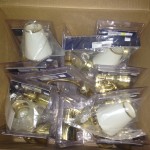
Lots of New lights
Lots of New lights


I knew it would happen eventually…

Well, Saturday was not the best day working on Akupara. Not a lot was accomplished even though the weather was fantastic and the yard was abuzz with lots of activity.

The day got off to a good start at about 8:30 in the morning when I arrived and I immediately set to work on a few items I needed to take care of.

They are going to be moving Akupara one stall over so that they can get a bigger boat in the spot where we are now and the one in front of it, so I needed to cut the chain that was attaching the dinghy to the jack stand and clean up the chain that was half hanging from the bow and piled in a not so neat pile on the ground.

I began by cutting the lock on the dinghy which of course was one of those high security locks, read harder to cut, and then moved on to the pile of chain on the ground. If you remember the chain in the locker was a partial ball of rust but about half of it was actually in pretty good shape. So I decided that if I cut the rusty section away, I would have a good backup or secondary partial rope partial chain rode.

In order to cut the chain I had to take one handle of the bolt cutters and place it against my hip and use both hands to pull on the other handle. The chain is tough that’s for damn sure. Of course in order to hold the one handle against my inner hip, I had to bend over into a crouched position.

Everything went fine and I made the 6 cuts (2 per link) as planned. I then climbed up the ladder onto Akupara, took one step down the ladder and froze. I stayed there for a little bit trying to decide if it was safer to back up, or to try to go down the rest of the way. I decided it would be easier for the emergency crews to get me off of the deck than it would be if I was also down below.

I managed to get the rest of the chain pulled up on deck and half of the rode into the chain locker before I had to stop completely. In hindsight I should not have continued of course but hey, I never claimed to be smart.

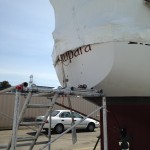
So by the time the Admiral and the crew arrived, I was ready to pretty much call it a day and had no intentions of trying to do anything else. Paige and August did get the anchor into the back of my truck and we spent a bit of time cleaning up the area around Akupara but I guess the biggest accomplishment was Paige started removing the previous owners hailing port from the stern. We are still deciding if we are going to change the font and colour of the name.

It is now Monday evening and I have not left the house since Saturday morning when I got home. I am pretty much confined to the couch and the bed but I am trying to get up and walk around a bit as much as possible. Hopefully I recover fast as I leave for Mexico in 6 days. If nothing else, maybe the Tequila will fix it 😉

FYI – when they say lift with your legs, they also mean pull with your legs. Your arms are a lot stronger than your lower back!

IMG_0917

IMG_0916IMG_0918

Has it really been 6 months???

https://youtu.be/swel19Kn4_o

A photo look back at 6 months of craziness! And yes it feels as fast as the video and just as confusing!! 🙂

A special thanks to all the crew for persevering thus far!

The tide has turned!

Hope everyone enjoys a look into our crazy little world! Thank heavens for the odd comedian to make it more interesting!

Cheers!

Rome wasn’t built in a day

It is interesting that yesterday we loaded the truck at home and brought parts of Akupara back to Akupara as opposed to the other way around. I guess that means we are just past slack tide and the flow has begun to go in the other way!

It is a great feeling to be at this point and start seeing some results of all of our hard work. The process of gutting and cleaning was a long one and the biggest part is yet to come, the engine removal, but the tides have definitely turned!

Yesterday I put the finishing touches on the anchor locker by cutting the rubber mats I was talking about to fit and by installing the rode divider. I changed my mind about glassing the divider in as it would make any further work in there nearly impossible so I went with a gigantic screw to hold it in place. This means that when the time comes to wash out the locker, I can remove the divider and the mats and get it nice and clean!

The mats and divider are installed.
Anchor locker 2
Anchor locker 2

I also managed to glass in the two holes in the cabin that had previously contained instruments. Last weekend we cut the marine plywood plugs and yesterday I took the grinder, bevelled the edges, and glassed them in with 6 layers of cloth and some structural filler in the epoxy. Next time down I will need to grind them flush and fill with fairing filler and epoxy so that there is no trace of them when we paint.

Old holes be gone
Old holes be gone


IMG_0899
While I was doing all of this, Andrea and Paige were sanding their hearts out. All of the ceiling slats were sanded on the visible side with the orbiting sander and any paint from the back side that dripped was removed by hand. They spent the majority of the day doing this and their efforts were clearly visible based on the amount of sawdust on the two of them.

a sanding we will go...
a sanding we will go…

Strange thing though, my random orbit sander started to act up around hour number 4. It started making funny noises and also had a weird smell of burning brushes. The admiral swore that she had been emptying it and that she had not been hogging it down hard but nevertheless it just wasn’t working well anymore.

Sabotage I say! And if this is the kind of thing that is going to happen on a regular basis, ie I am tired so I will break the tool, I need to revisit the overall budget for this project and increase the tool allowance! Thankfully there is a Lowe’s hardware store about 10 minutes away so the any more of this nonsense will result in new tools 😉

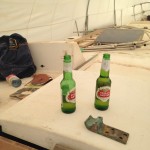
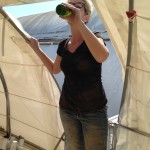
It is starting to get nice in the Pacific North West and under the shrinkwrap it is even warmer! So we broke our own rule of not having beer on the boat until we launched and enjoyed our first ice cold beer on Akupara amidst all of the chaos!

Our first beer on Akupara

IMG_0910

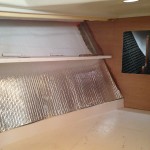
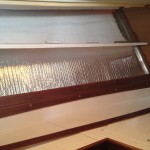
As the ladies were finishing up the sanding of the v berth pieces, I was installing some insulation. Insulation? Yes insulation! There are 3 reasons we are adding insulation as we proceed through this rebuild. 1) As we plan to liveaboard, any heat we can retain will be advantageous as we both hate being cold. 2) When we finally get to warmer climates, the insulation should do the opposite and help to keep the belly of the beast a little cooler. And 3) I have heard a rumour that adding this silver bubble foil insulation actually increases your radar return to other vessels. I am not completely sold on this as I have no direct proof, but anything that increases our radar signature and makes us more visible to oncoming ships in the fog, is a good thing in my mind!

Insulating
Insulating
The v berth ceiling going back

By adding the insulation beneath the ceiling, I have left a 2″ air gap in between the hull and the ceiling. So, cored hull which is warmer than a non cored hull, 2″ dead air space, and reflective insulation beneath the ceiling, should keep us toasty warm and hopfully reduce any condensation buildup.

And after a long day of work on several different projects, we almost have the v berth back to a state of completion.

V berth ceiling with first coat of cetol Natural teak.


The perfect marine head?

As we slowly get closer to completing the v berth, I am beginning to turn my thoughts and research towards the foreward head.

We have been looking at many different ideas as to how to cover, change, update, repair the white plastic laminate on the walls, new taps for the sink and shower and of course now I am starting to research marine heads, or toilets, for those who don’t speak pirate.

It absolutely amazes me that there are so many choices. Manual vs electric, macerating vs not etc etc. Don’t even get me going on marine sanitation hose and the myriad of choices (read costs) there. It doesn’t seem to matter which brand we decide to go with as all of the reviews, yes people post reviews about their marine toilets, have both good and bad comments.

For those who are not in the know, marine toilets are extremely sensitive little marvels of technology. They suck water in from outside the boat through a special hole that you have drilled, at the same time as not sinking your boat. They have a bewildering network of hoses and valves and fittings and pumps and many different ways of disposing of the contents.

The major rule of law is, if you have not eaten it, it does not go in the head. The second rule of law, at least on my boat, is if you plug it, you fix it. I am adamant about this one and so far it has worked in my favor as I have yet to have to unclog any of our marine heads.

I worry about installing the right heads as, since we will be living aboard eventually, it will be subjected to a lot more use than a weekend boat and the last thing I want to do is spend my days repairing heads.

So in my search for the best of the best, most reliable, non clogging, easy to repair, simple to operate, easy to clean, quiet, non smelly marine sanitation system, I have finally found the PERFECT solution!

Our new Head
Our new Head?

Now to convince the Admiral and crew!

Let there be light…okay lamps!

We have been eyeballing interior lamps for Akupara for quite some time and the closer we get to finishing the V berth, the more important it becomes to have something new for Akupara.

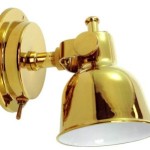
So….I just finished placing an order for ALL of the interior lamps for Akupara and while I was at it, I ordered a new 300′ anchor rode for the primary. I figure 300′ of rode and 250′ of chain on both primary and secondary forward anchors should give us one hell of an anchoring depth.

Anyway, what is it that BOAT stands for, yup, Bring-On-Another-Thousand!!

Lights